Showing posts with label Baby. Show all posts

Saturday, August 11, 2012

Joshua's Nursery

It's finished! Finally. Ten days before his scheduled arrival. Walking past his nursery and catching a glimpse of his stenciled book ledges from the living room makes me feel so happy. I can't believe the journey this pregnancy has been, but I am so grateful to be ten days from my due date with a healthy and developed baby incubating.

Upon entering the nursery. His room is part of a jack and jill suite that shares a bathroom with our guest bedroom. One day I will decorate it for both boys to share, but for now it is still just for guests. 
 This room is fairly small, but has plenty of room for what we need. Those black french doors lead to the guest room.
This room is blindingly bright for portions of the day, and the crib really glows like that in the early afternoon. I love it, but we'll definitely be closing the blinds for Joshua's naps.
 Ledge bookshelves built by Don's dad, who is such a talented carpenter. I painted them white and stenciled little owls and woodland creatures on one end of each shelf.
 I love this little changing table from Walmart. I bought it because it was cheap and the perfect size, but once it was assembled (thank you, Dad!), it was a little lackluster. I painted the knobs with blue acrylic paint and added white polkadots before sealing them with a very thin coat of polyurethane, made covered storage bins to hold diapers, wipes, and swaddlers, and added a hand painted woodland scene.
My father-in-law cut a 1/8 inch piece of scrap wood to fit the ledge around the top of the changing table, and I added layers of turquoise and blue paint before stenciling and sketching owls, trees, mushrooms, and a couple of love birds and squirrels onto the wood. Once everything dried, I dipped a wadded up paper towel into brown acrylic paint and dragged and dabbed it over the painting, wiping it every few seconds with a wet rag. This made it look distressed and gave it a bit more dimension. 
 I sewed a little pillow for William to snuggle up with and read. The books on the bottom two shelves are all of his favorites and we read in Joshua's room at least twice a day now.
 I bought a $5 frame from Goodwill, removed the glass (and the scary Dubuque poster circa 1982 from it), and made a new background from craft paper. I glued lengths of twine, anchored with whatchamacallits (wow, I'm too lazy to look the name up even though I'm already online...sad), and used tiny white clothespins to display sweet notes from friends and family written for Joshua as part of his baby blessing. 
 Nothing in his nursery is fancy, but everything was made with love. Just some pom pom trim to edge the lamp shade.
 His crib, the same crib my sisters and I slept in as babies 30 years ago. See those storage boxes to the right of his crib? I bought a ton on clearance at Joann's and they house clothes that Joshua won't need for months. The boxes look so sweet stacked in a tower, but since William's favorite game is dumping things out of boxes and reorganizing them, I had to move the rest of the boxes into the closet.
 His verse, pinned inside a handmade frame I bought when Ginger's was closing down. 
 These bunny slippers were the very first thing I bought for William before he was born, but he was such a whopper of a baby that his feet were never small enough to wear these sweet little booties. I wanted to display them in Joshua's room because this room really is a space for me to cherish both boys.
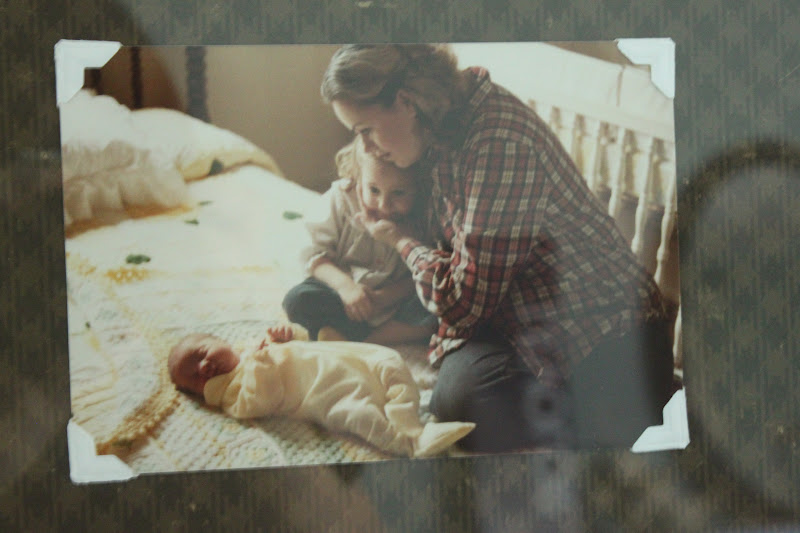
More framed prints from Ginger's that I purchased when they closed down. And the middle frame is my all-time favorite photo of my mom, older sister, and me.
 I ruffled teal ribbon and glued it to a white frame.
 I really love the old-fashioned alphabet cross stitch samplers. 
Now all we need is Joshua. His new Moses basket awaits.

Sunday, July 22, 2012

What a Heart Can Hold


I sit in the booth at our favorite Chinese restaurant as Don orders his meal, and I feel the little body in my womb squirm and stretch. His head nuzzles my hip; his feet try to find their way between my ribs, and I gently press my hand to my belly to calm his frenzied activity. When he is born in less than a month, I will swaddle him, I will wrap him tight, hold him close and sing to him. For now, though, I mother him as best I can through the barrier that both connects and separates us, my body.

Our waitress smiles at me and asks, "Do you have other children or is this your first?"

There is no pause when I answer, "No, we have a two-year-old son at home with his grandparents."

Don and I smile casually but I look at his eyes and know he is thinking of them both, our other two little ones. The ones who came between William and Joshua. The ones who came and left.

In the late evening, when William is asleep in his room and Don is finishing up work notes in his office, I go into Joshua's nursery and sink down into the glider. I put my hands on my belly and I look at his crib, his books, the piles of sweet newborn clothes waiting for him, and I am so overwhelmed with peace and thanks that I would probably fall to my knees if I weren't already sitting down. I still don't understand the details of His plan, how God decides who will stay and who will go and who will hurt and who will have a baby and who will not. I am grateful for this. I know in the deepest recesses of my heart that knowledge of His plans for my future would be far too great a weight for me to carry.

Here in our home, in this tiny room that has been painted for a baby, there is peace. There is love. There is belief in an author of life, an original creator who remains even to this very moment.

I rock in the glider and close my tired eyes because, as it most always is with a two-year-old in tow and the full weight of the third trimester in my womb, today has been a long day. I sing, like I always have.

Lord, prepare me
to be a sanctuary
pure and holy, tried and true.
With thanksgiving, I'll be a living
sanctuary for you.

Here in my heart, God has carved out a space that I never dreamt could exist. A sanctuary is being built. I think of all the joy, followed by sorrow, the tears that would not stop coming, the bitterness that was so tempting to plant but that I weeded out with His grace alone. I feel where the sorrow bloomed to hope and the fears gave way to surrendering, and now, here in my heart, there is a sanctuary. And there is room for each child He gave us, William, Violet, Jordan, and Joshua.

What can a heart hold? There is no limit. There is no limit at all.


Tuesday, July 17, 2012

My New Favorite Room

It isn't finished yet, but everyone has been helping me get Joshua's nursery ready for him. This is the sunniest room in our house; it is illuminated for the first half of the day. William and I spend an hour every morning reading in Joshua's glider (which William hesitantly handed down).

 I love that Joshua will sleep in the same crib I did as a baby.
 Joshua's new stuffed animals, thrown into the crib to save them from William.
 My gracious father-in-law built book ledges for the nursery and I painted them white. Billye, my mother-in-law, spent days painting the walls and all of the trim, which was still gold (in oil based paint, ACK!) from the previous owners.
 The blanket I made for Joshua months ago, when I was on bed rest.
 His bedding. When the sun shines on the crib, it is washed in light, hence the faded colors. We still have to install blinds.
 A photo of my mom, big sis, and me as a (huge) newborn baby. Note that crib in the background!
 Sweet cross stitch samplers saved from Ginger's, a handmade arts institution in Austin that is sadly closing down.
 An unfinished project.
 More unfinished projects. This frame might be my best Goodwill find yet.
 Newborn kimono onesies, the first things we bought for Joshua after weeks wondering if he would really stay.


Has anyone tried to take a pregnancy shot of themselves without a tripod? It's hard work.

Monday, June 25, 2012

Baby Bedding & the Beauty of Sewing

When I was eight months pregnant with William in 2010, I decided on a whim to purchase a sewing machine and learn how to sew. I dabbled in sewing for a few weeks and felt extremely frustrated by the small tasks of learning to thread the machine and refill the bobbin, and I was too intimidated to attempt the scarier side of sewing. And by scary I mean anything involving cutting on the bias, zippers, elastic, or working with a shape other than a square. 

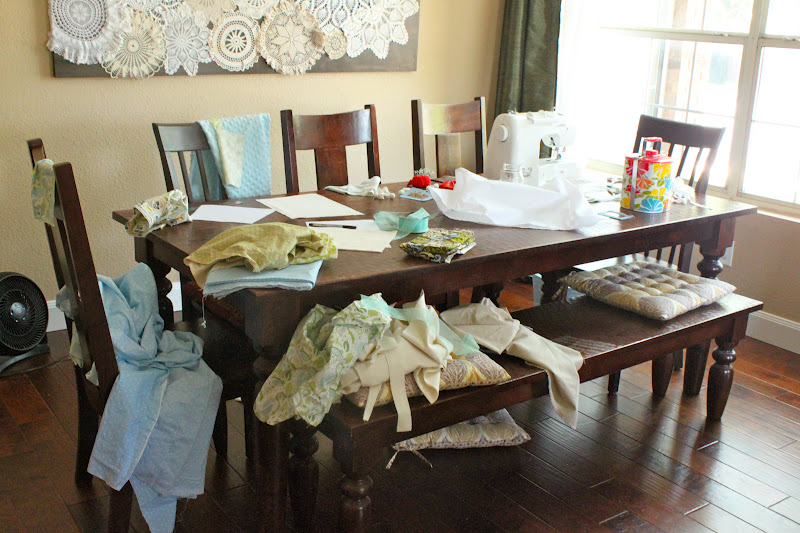
But the strong allure of charming handmade gifts and having customized items that I wouldn't be able to afford otherwise lured me in, and I have continued to drag out my machine and its messy accessories on a regular basis. In fact, our huge dining room table looks this more days than not.
Just keeping it real, people.
I don't mind the mess because sewing has been a great creative outlet for me, and I always take on projects with instant gratification. Like making changing pad covers for Joshua.
Changing Pad Cover

I used the tutorial for contoured changing pad covers written by A Load of Craft as the basis of my plan for creating the cover, but I didn't follow it for the changing pad pictured above. There's nothing wrong with the tutorial, but the two I made from three cuts of fabric didn't turn out as well as I'd hoped, so I decided to revise the process a bit for myself.

Contoured Changing Pad Pattern
Exhibit A. Just trace the contoured side of the changing pad onto paper (I used wax paper because it was handy).
There is a perfectionist lurking inside me, and I had to fight the urge to make the pattern look straight and pretty. As A Load of Craft points out, the sides of these changing pads are not straight and pretty, so the traced pattern is going to be a little weird looking, too. Accept it and move on.

Remember to sew the contoured side to the top piece as though both pieces have straight edges.
I got the smoothest fit by cutting a single piece of fabric to cover the top and then sewing on the four individual side pieces with enough extra fabric to go underneath the pad and make the elastic casing. I am posting the picture above because I thought the trickiest part was sewing the contoured piece to the center piece of fabric. The pieces should be pinned and sewn as though they are both straight cuts of fabric. 

See that little raised tuck of fabric on the left side of the photo above? That's a result of having the contoured piece pulled down in a straight edge. (Don't be thrown off by the size of the top cut of fabric. I used an old baby blanket that I made for William but we didn't use it much.)

This pad cover is adorable and I haven't found any off the rack changing covers with fabric as cute as this online or in stores, unless we're talking about spending a tiny fortune on baby bedding. Which I am not.

There you have it. A sweet custom changing pad cover for a fraction of the cost of buying one. Let's look at it again, shall we?

Cute! 


Sunday, June 24, 2012

The End of a Season & Budget Decorating

This week at the doctor's office, after twelve weeks on bed rest, my maternal fetal specialist officially ended my restrictions. We've quickly returned to our normal pace around here, with a few big changes. The first two weeks on bed rest were nightmarish for me, only because I was prohibited from engaging my abdominal muscles (that's a tall order!) and I felt like the only thing I could do was sit and worry that we were going to lose a third baby. After those two weeks, though, my body began turning around and my spirit followed suit. I will never forget the amazing things that happened in my heart, our house, and especially my womb during that time. Healing without explanation, beating all of the odds, lots of prayer, and a new understanding of the breadth of God's love for us. In the thirty years of my life, this past year has been a long season of loss and grace and stumbling, but I feel like the repeated losses, at least those related to pregnancy and health, are slowly coming to an end.

On a much lighter note, now that I am no longer on bed rest, I am catching up on getting our house and Joshua's nursery ready for a new baby. We obviously have some major medical expenses right now, so I'm doing my best to keep the cost of this nursery down.

Way down.

We ordered a changing table from Walmart.com (did I mention we're on a budget?) and it has open cubbies at the top to house diapers and wipes. I knew we needed baskets for the cubbies, but I wanted to spend less than $5 a basket, and I wanted something durable, sturdy, and cute.

Slipcovers for Baskets
Never you mind that yellow wall and gold trim. They'll be gone pretty soon!
Last week at Joann's (which has been my only stop on the way home from the hospital, since the store near us is small enough that I can walk around without breaking any of my doctor's rules), I found these blue mesh storage bins on clearance for $4 each, down from $8.99. Score! The down side is that they're ugly. Or at least they were. Now they are cute and I kind of love them.
Cute Cheap Storage

Changing Table Baskets

After staring at them for 15 minutes and contemplating hot gluing fabric to the fronts, I knew I wanted to make slipcovers so that I could change the look in the future (I have big plans for this changing table once there are no more diaper-wearers in this house). I will try to post a step-by-step tutorial later, but I just traced the sides of the box onto paper and used that as a pattern. I used coordinating fabric and ribbons for the front panels and plain muslin for the sides and back. I sewed them snugly so they stay upright once you tug them on and there's no sagging. I have plans for labeling the bins, but these bins came with label pouches sewn on the front and sides, and I used my seam ripper to remove them before I slipcovered them. If you want the labels to remain, just stitch them back on to the front of your slipcover.

I already owned all of the fabric for these boxes, so this project was really just $4 per bin. I am so happy with the way the slipcovers turned out. If you make some of your own, I'd love to see pictures!